
Artisan Cutlery Made by Hand in the USA
I draw my inspiration from the intersection of nature and culture.. This balance reflects our human condition and how we connect with the world around us through using tools.
As the late great Bob Loveless said, “no matter how sophisticated we become, a knife takes us back to the cave.”
I see knife making as a way to further explore this relationship between experience and material culture. I invite you to join me in the journey.
I offer my work through a range of one-offs available now, as well as through full custom work wherein we collaborate on designing your dream blade! Overall, my goal is to provide a personalized experience along with heirloom quality craftsmanship supported by a lifetime guarantee.
One of my main goals is sustainability, and not just in the economic sense of providing the highest quality for an affordable price, but in the way my practices as a maker affect the environment. To this end I have dedicated myself to sourcing my timber from responsible suppliers and purchase nearly all of my equipment and supplies from US sources. I am proud to face the challenges of this humble pledge and consider it as important a part of my work as the hardening of the steel.
Sharpening Your Knife
The most difficult knife care task is said to be sharpening a blade. Modern stainless steel is very hard and when sharpened properly, will hold a good edge for a very long time.
When sharpening a knife, you must have a high quality sharpener that features a rough stock removal surface of diamond abrasive and a finishing surface of hard stone or ceramic abrasive. The diamond and ceramic materials will cut away the blade’s cutting surface easily as these materials are much harder than steel. A hard stone will also perform this task, but the stone is only slightly harder than the steel and this requires more effort on your part. Before you put your knife on the stone you should coat the stone with a little oil. The oil will float the metal and stone particles that are produced in the sharpening process, enabling you to wipe them off at the end of the process so that the pores in the stone do not get clogged.
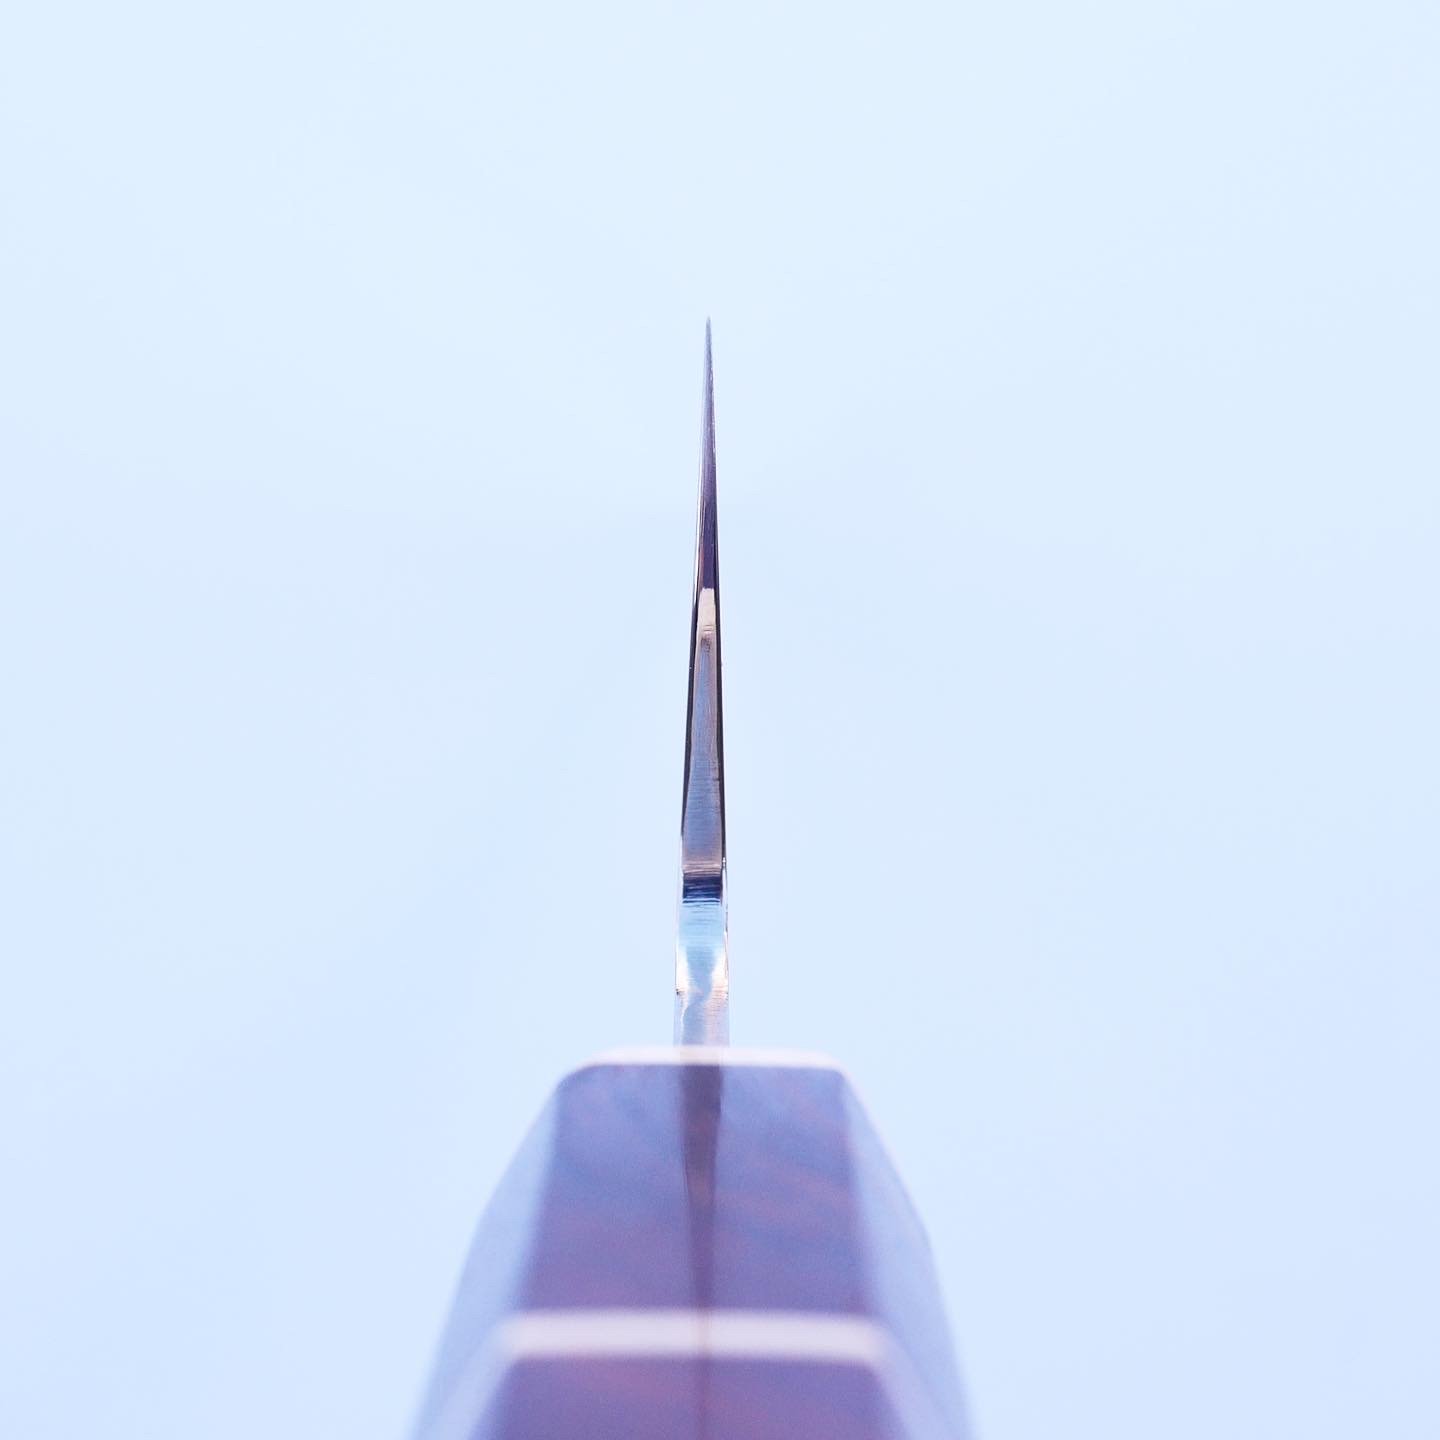
As you sharpen your knife on a stone, there are several factors to keep in mind: the angle of the blade, the pressure of each stroke, the number of strokes per side of the edge and sharpening the entire edge. A General rule of thumb is to sharpen hunting knives at 20 to 30 degrees and kitchen knives at 15 to 20 degrees. See above image.
Once you have the proper angle, draw the knife across the stone toward the edge. Try to imagine that you are slicing a very thin piece off the stone. Draw the blade in a sweeping motion so that the entire edge comes in contact with the stone. Make sure to hone the tip of the knife too. Grind one edge along the stone edge-first until a burr is formed on the other side of the edge. You can feel the burr with your thumb, on the side of the edge opposite the stone. The presence of the burr means that the steel is thin enough at the top that it is folding over slightly, because the bevel you have just ground has reached the edge tip. If you stop before the burr is formed, then you have not ground all the way to the edge tip, and your knife will not be as sharp as it should be. The forming of the burr is critically important – it is the only way to know for sure that you have sharpened far enough on that side. Once the bur r is formed on one side, turn the knife over and repeat the process. Make sure and use the same number of strokes on each side to make a keen edge. After the knife has been sharpened, use progressively finer stones to hone the knife to razor sharpness.
Glossary of Common Knife Making Terms
Blade: That portion of the knife used primarily for cutting
Bolster: Piece of metal added to the handle above the guard for strength and decoration.
Epoxy: a bonding agent composed of polymide or amino resin to which is added a hardening agent which causes a chemical reaction to occur.
Guard: In knife design, a synonymous term for hilt. That portion which forms a platform for the users hand between the handle and the blade.
Micarta: A synthetic handle material developed by wood laminates, linen or paper combining with a phenolic resin.
Pakkawood: Multiple layers of maple or birch veneers that have been impregnated with resin and color and then bonded under high heat and pressure to from one piece.
Pins: Short pieces of malleable metal (usually brass or copper) used to join knife parts, especially scales to tangs.
Pommel: A piece of soft metal, usually curved, and affixed to the upper portion of the tang. Pommels are generally thought of as being larger and more prominent than butt plates or caps.
Ricasso: The unsharpened portion of the blade immediately below the hilt.
Rivets: “Cutlers Rivets” – A special-purpose two-piece rivet widely used for joining scale handles to tangs.
Scales: Known also as slabs, these relatively thin pieces of wood, stag, horn or synthetic material are pinned or riveted to the tang in full tang construction.
Stag: Antler material from any member of the deer family.
Tang: That portion of the knife that extends into or through the handle.
Temper: The process of reheating hardened steel to a desired temperature, below its critical temperature point, primarily to impart toughness.